How to Import Inventory Transactions from Excel into Tally Prime
To import inventory transactions (such as stock movement, sales, purchases, and inventory adjustments) into Tally Prime from Excel, you need to follow two main steps:
1. Create or export a sample Excel file that provides the correct format for inventory transactions.
2. Import inventory transactions from your prepared Excel file back into Tally Prime.
Here’s how to do this step-by-step:
1. Export/Download a Sample Excel File for Inventory Transactions in Tally Prime
Since Tally Prime does not directly provide a sample Excel file for importing, you can export existing inventory transactions from Tally to Excel to use as a template.
Steps to Export Sample Excel File:
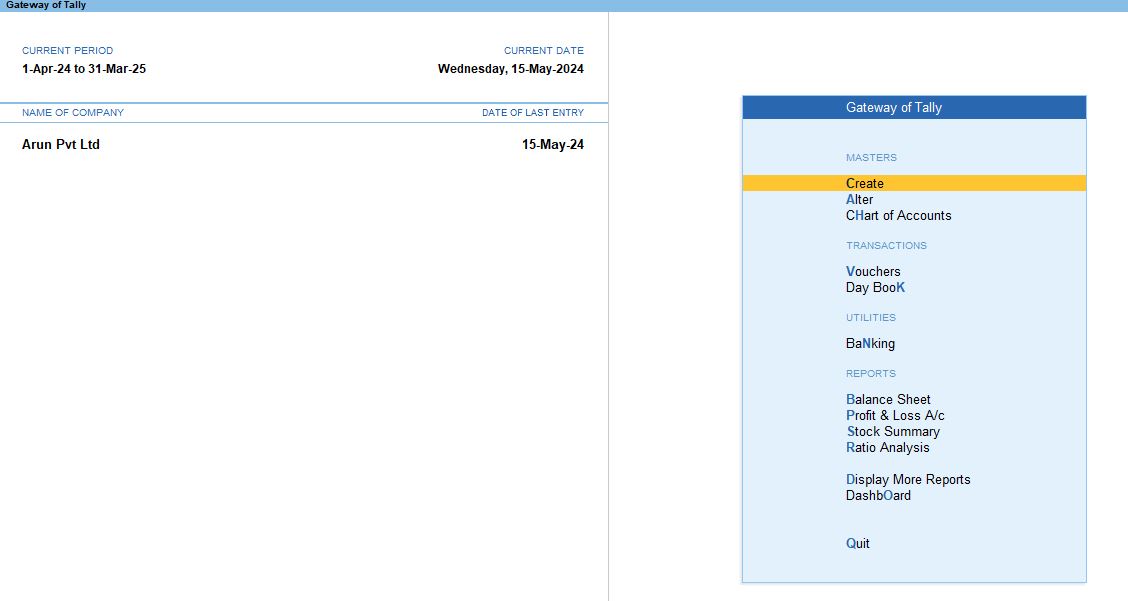
Open Tally Prime:
- Launch Tally Prime on your system.
Go to Day Book or Inventory Vouchers:
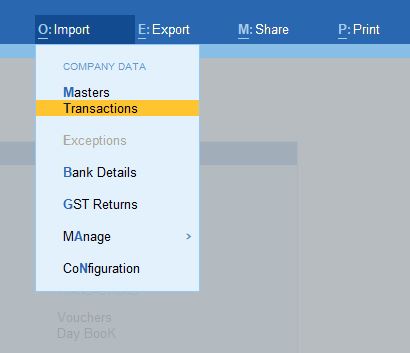
- Navigate to Go To>Alt + O to view a list of transactions, or go to Manage under Sample Excel File >Transactions
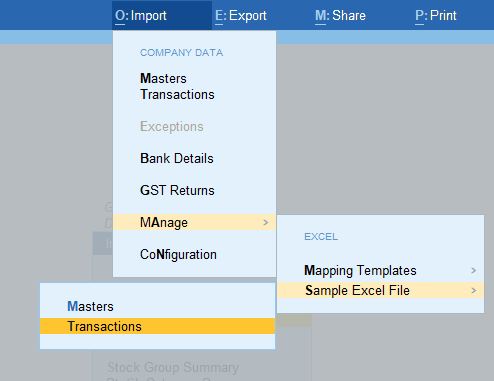
Export Data to Excel:
- Once in the Day Book or Inventory Vouchers section, press Alt + O to open the Export menu.
- Select Excel as the export format.
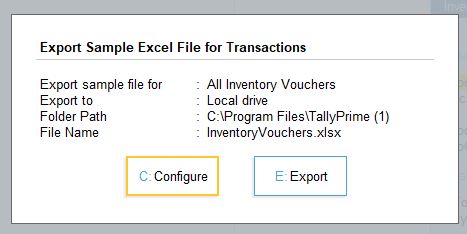
- Choose the destination where you want to save the Excel file.
- Set any other options like date ranges, voucher types, etc.
- Press Enter to export the file.
This exported file will give you a sample format that shows how the inventory transactions should be structured.
2. Prepare the Excel File for Importing Inventory Transactions Understanding the Required Fields:
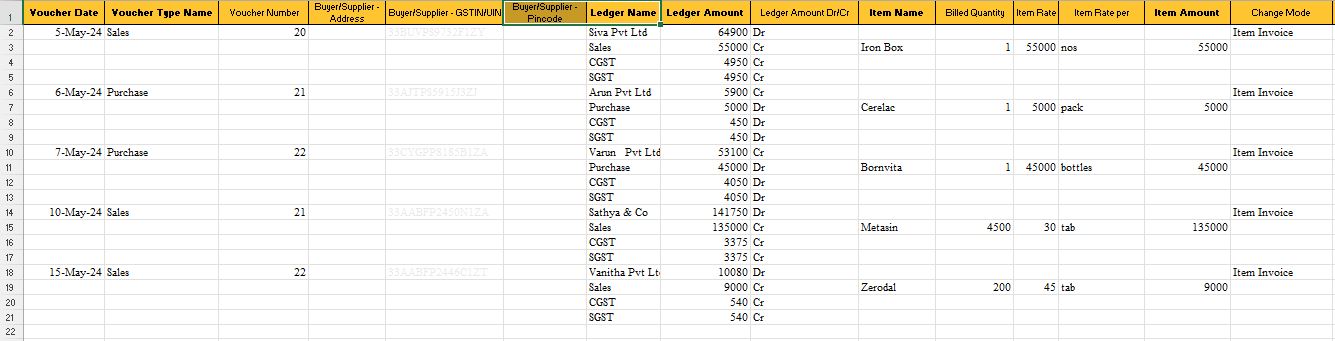
The Excel file must include the following columns for inventory transactions:
- Voucher Date: The date of the transaction.
- Voucher Type: Purchase, sales, stock journal, etc.
- Stock Item Name: The name of the stock item.
- Quantity: The number of units involved in the transaction.
- Rate: The rate per unit.
- Amount: The total value.
- Godown/Location (if applicable): Specify the warehouse or location.
- Ledger Name: The corresponding ledger involved in the transaction (for sales, purchase, etc.).

Fill in the Excel File:
- Use the exported Excel file as a guide, and fill in your transaction data in the correct columns.
- Ensure that the stock items, ledgers, and other details match the records in Tally Prime.
- Double-check data formats, such as date formats, amounts, and quantities.
3. Import Inventory Transactions from Excel into Tally Prime
Once your Excel file is ready, you can import the data into Tally Prime.
Steps to Import Inventory Transactions:
Open Tally Prime:
- Start Tally Prime.
Go to Import Data:
- From the Gateway of Tally, press Alt + O or navigate to Utilities>Import Data.
Select Import Type:
- Select Vouchers because inventory transactions are usually entered through vouchers (such as sales, purchase, or stock journal vouchers).
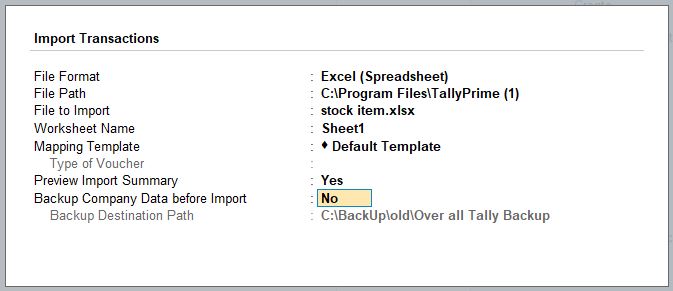
Provide the Excel File Path:
- Enter the full path of the Excel file that contains the inventory transaction data.
Configure Import Options:
Tally may ask you to configure options such as:
- Overwrite existing vouchers: Whether you want to overwrite any existing vouchers.
- Date range: You can specify a range if necessary.
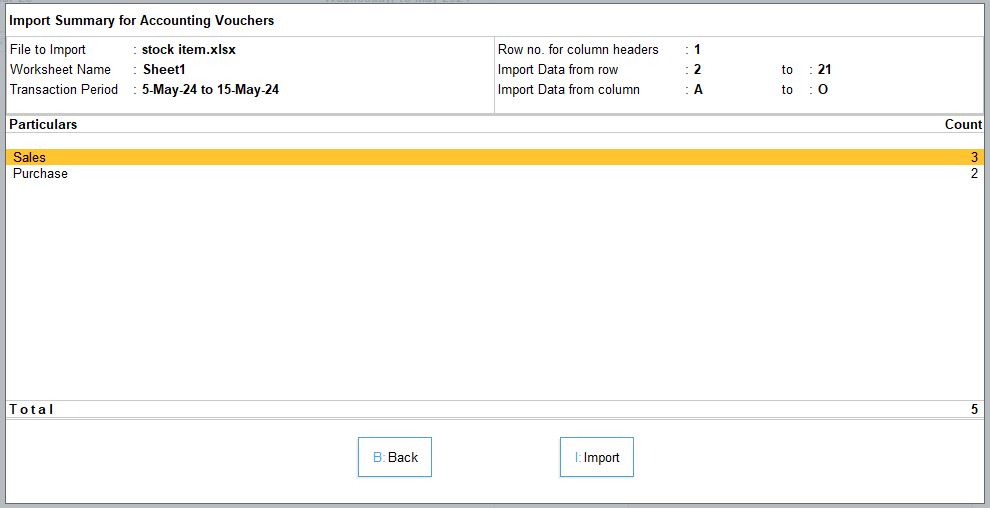
Start the Import:
- Press Enter to begin the import process.
- Tally will process the Excel data and import the inventory transactions into your selected company.
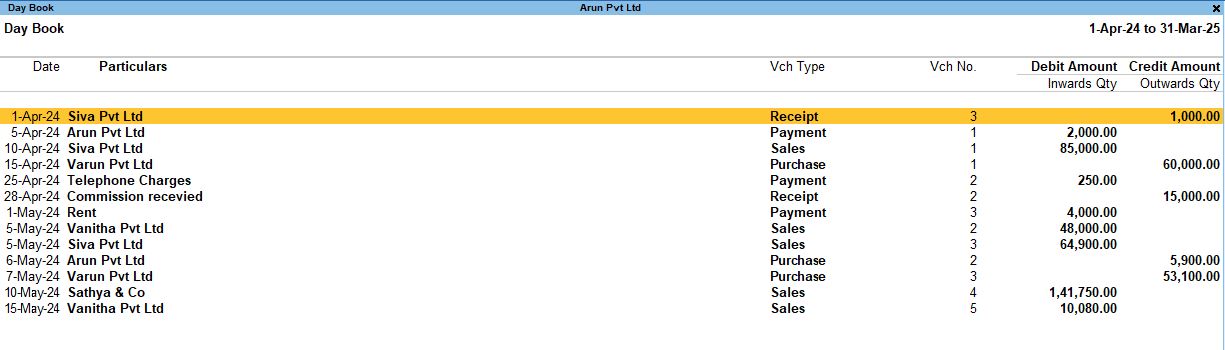
Verify the Imported Transactions:
- After the import is complete, verify the transactions by checking Display>Day Book or Inventory Vouchers to see if the data has been correctly imported.
Tips for Successful Import:
- Data Accuracy: Ensure that the stock item names, ledger names, and other key data points match exactly what is already set up in Tally Prime, as discrepancies can cause import errors.
- Voucher Types: Ensure that the voucher type in your Excel file (such as Purchase, Sales, or Stock Journal) is correctly mapped and corresponds to the available voucher types in Tally.
- Formatting: Make sure the date format in Excel matches Tally's format (typically DD-MM-YYYY).
By exporting a sample Excel file, preparing it with the correct data, and following the import steps, you can easily import inventory transactions into Tally Prime.
Tally Prime
Learn All in Tamil © Designed & Developed By Tutor Joes | Privacy Policy | Terms & Conditions