Customizing Reports with Apply Filters in Tally Prime
In Tally Prime, applying filters to voucher transactions allows you to view specific entries based on criteria like date, voucher type, ledger, amount, and more. This feature is especially helpful when you're analyzing or reviewing large amounts of transaction data.
In Tally Prime, you can apply filters to voucher transactions using Ctrl + F (Apply Filter). This allows you to focus on specific data, such as transactions related to a specific ledger like "Cash". Here's a detailed explanation of how to apply a basic filter in Tally Prime using Ctrl + F, and how to configure the filter settings with F12 Configuration.
Steps to Apply Filters to Voucher Transactions in Tally Prime
1. Open Tally Prime
- Start Tally Prime on your computer.
- Open the company where the voucher transactions are recorded.
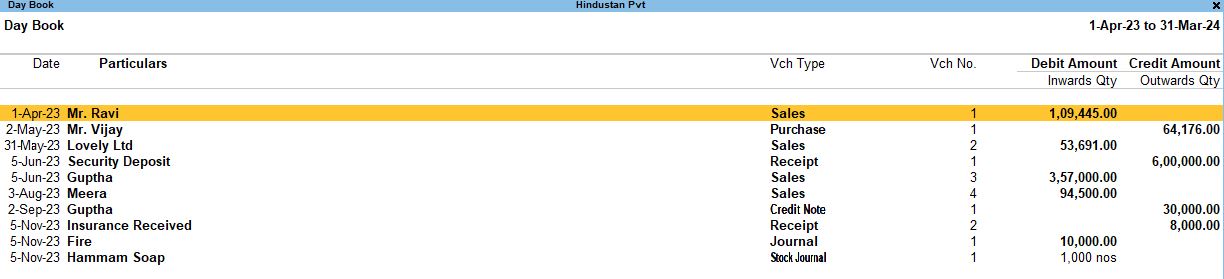
2. Access the Day Book or Ledger Report
To apply filters on voucher transactions, you first need to open a report that lists these vouchers. The two most common reports for viewing voucher transactions are:
- Day Book: This report shows all voucher entries made on specific dates.
- Ledger Report: This report shows transactions related to a specific ledger (such as Sales, Purchases, Bank Accounts, etc.).
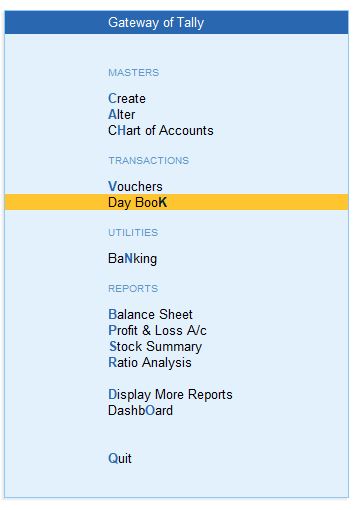
Accessing the Day Book:
- The Day Book is a common report where you can apply filters to see specific vouchers.
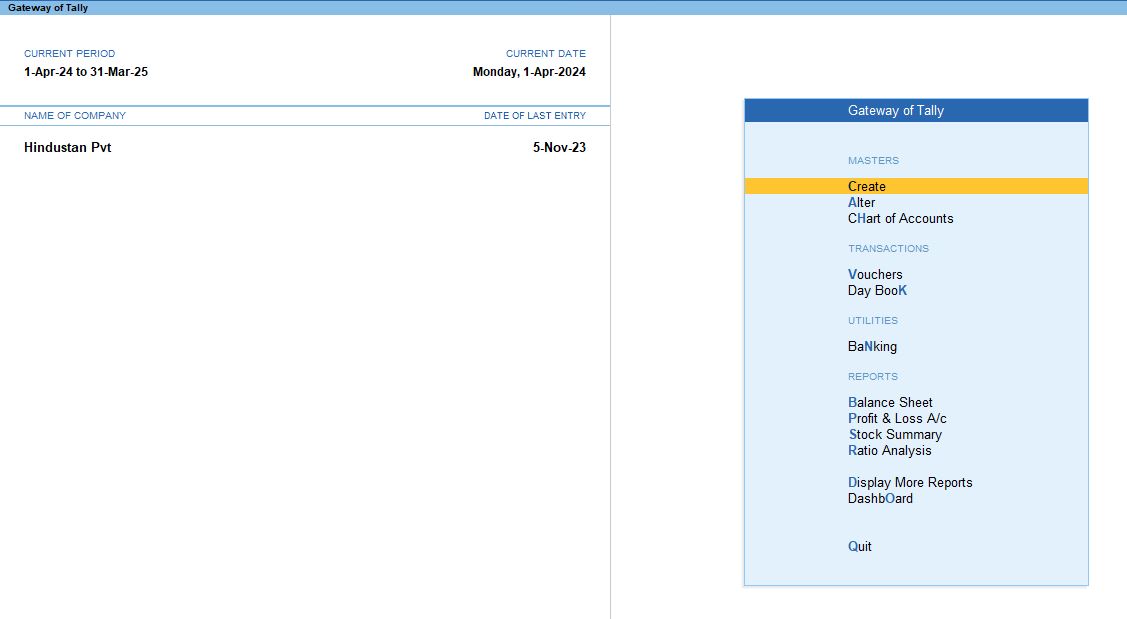
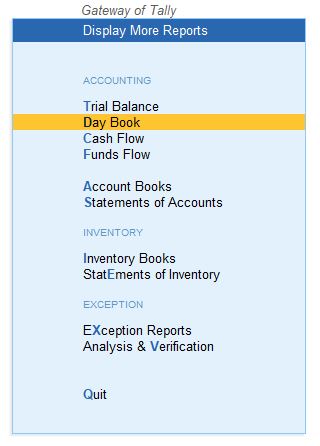
- From the Gateway of Tally, navigate to:
- Display More Reports>Day Book (or press D for the Day Book directly).
- The Day Book will display all voucher entries for a selected period.
Accessing a Ledger Report:
- From the Gateway of Tally, go to Display More Reports>Accounts Books>Ledger.
- Select the specific ledger for which you want to see transactions.
Common Filter Options:
A. Filter by Date
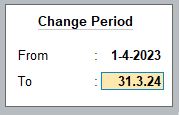
- To filter transactions by date, press F2 (Period) or select the date range at the top of the screen.
- Enter the From Date and To Date for which you want to view vouchers.
B. Filter by Voucher Type (F4)
- If you only want to see certain types of vouchers (like Sales, Purchases, Payments, etc.), press F4 (Voucher Type).
- Tally will show you a list of voucher types available in the system. Select the type you wish to filter, for example, Sales.
- After selecting the voucher type, the report will show only those transactions related to that type.
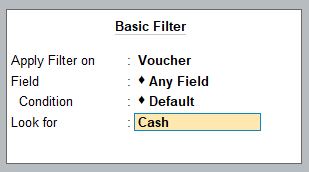
C. Apply Filter (Ctrl + F)
- While viewing the Day Book or any other report that lists voucher transactions, press Ctrl + F to open the Apply Filter screen.
- This shortcut allows you to specify criteria to filter the vouchers you want to view.
4. Configure the Filter Fields
In the Apply Filter screen, you will be able to configure different options such as Apply Filter on, Field, Condition, and Look For.
Here's how you can configure these fields:
A. Apply Filter on: Voucher
- This option tells Tally that you are filtering voucher transactions.
- By default, it should be set to Voucher. If not, select Voucher as the filter base.
B. Field: Any Field
In this section, you need to specify the field on which you want to apply the filter. The field can be:
- Voucher Date (if you want to filter by date),
- Voucher Type (for filtering by Sales, Purchase, Payment, etc.),
- Ledger Name (if you want to filter by a specific ledger like Cash, Bank, etc.),
- Amount, and so on.
For this example, if you're filtering vouchers related to Cash transactions, choose Ledger Name as the field.
C. Condition: Default
The Condition is used to specify how the filter should match the values. The condition can be:
- Equals: Shows entries that exactly match the value (useful for specific vouchers or dates).
- Contains: Shows entries that contain the specified value (useful for searching partial matches).
- Greater Than or Less Than: Used for numeric filters like amounts.
For basic filtering, the default condition should work in most cases, especially when filtering by names.
D. Look For: Cash
- This is the most important field. Enter the value you want to filter for.
- For example, if you want to see all vouchers that involve Cash, enter Cash as the value here.
- This will ensure that only vouchers linked to the Cash Ledger will be displayed in the report.
5. Confirm and Apply the Filter
- After entering the filter criteria, press Enter to apply the filter.
- The report will now refresh, showing only those vouchers that meet the specified condition (e.g., all vouchers involving the Cash Ledger).
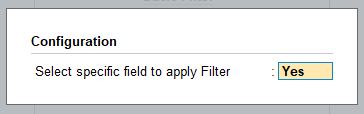
F12 Configuration for Specific Fields
After applying the basic filter, you can further customize the report using F12 (Configuration). This allows you to show or hide specific fields in the report and fine-tune the filter.
Steps to Configure F12 Settings:
1. Press F12: While in the filtered report, press F12 (Configure) to open the configuration options.

2. Select Specific Fields to Display: You will see options to show or hide certain fields like:
- Voucher Number
- Ledger Details
- Narrations
- Amount
3. Enable/Disable Fields: You can enable the fields you need by selecting Yes or No for each option. For example, if you want to see more detailed information about each voucher, turn on the relevant fields (like Voucher Type, Ledger Details, etc.).
4. Save the Configuration: Once you've made the necessary adjustments, press Enter to save the configuration.
This step enhances the visibility of key data points based on the filter you’ve applied.
Example of Applying a Filter on "Cash" Ledger:
Let’s go through an example where you want to filter for all vouchers involving the Cash Ledger.
- 1. Step 1: Open Day Book by navigating to Display More Reports>Day Book.
- 2. Step 2: Press Ctrl + F to open the filter options.
- 3. Step 3: In the Apply Filter on field, ensure Voucher is selected.
- 4. Step 4: Set the Field to Ledger Name.
- 5. Step 5: Keep the Condition as Default(or set it to Contains if you're not sure about the exact name).
- 6. Step 6: In the Look for field, enter Cash.
- 7. Step 7: Press Enter to apply the filter.
Now the Day Book will show only the vouchers that have entries involving the Cash ledger.
Key Points to Remember:
- Ctrl + F (Apply Filter) is used to filter specific vouchers based on conditions like ledger name, voucher type, date, or amount.
- The F12 (Configuration) option helps you further customize the report by selecting which fields are visible.
- Advanced filters like Alt + F12 (Range) allow you to apply more detailed filters if needed.
Conclusion:
Applying filters in Tally Prime using Ctrl + F allows you to focus on specific voucher transactions, making it easier to analyze data. For example, filtering for vouchers involving Cash or any other specific field can be done quickly using this feature. Additionally, using F12 Configuration allows for more customization in how you view the filtered data.
Tally Prime
Learn All in Tamil © Designed & Developed By Tutor Joes | Privacy Policy | Terms & Conditions