JavaScript Simple Tabbed Navigation Using Dashing Style with HTML and CSS
he JavaScript Tab, or HTML5 Tab control is a simple user interface (tabs UI) for organizing related content and occupying a compact space. The tabs are aligned horizontally, and each tab is associated with its header. One of the tabs must always be selected and visible.
JavaScript tabbed navigation is a method of organizing content on a web page by grouping it into separate tabs, with only one tab being visible at a time. This allows for a more organized and efficient way to present information on a page, as the user can easily switch between different sections of content without having to scroll through the entire page.
To implement tabbed navigation in JavaScript, the developer typically uses HTML and CSS to create the tabbed interface, and then uses JavaScript to add interactivity and control the display of the different tabs. The basic structure of the HTML for a tabbed interface usually includes a container element, such as a <div>, that holds the tabs, and a separate container element for each tab's content.
The CSS is used to style and layout the tabs and the content area, and JavaScript is used to add interactivity by detecting when a user clicks on a tab and then displaying the corresponding content. This is typically done by using event listeners to detect when a user clicks on a tab, and then using JavaScript to modify the CSS styles of the tab and content container elements to show and hide the appropriate content.
There are different libraries and frameworks that can be used to implement tabbed navigation in JavaScript, such as jQuery UI, Bootstrap, or Material-UI. These libraries provide pre-built tabbed navigation widgets that can be easily integrated into a website, and can save the developer time and effort by providing a consistent and polished user interface.
It's also possible to use vanilla JavaScript to create your own tabbed navigation. The basic idea is to create a JavaScript function that listen to the click event of the tabs, and then show the content of the clicked tab, hiding the others.
This section briefly explains about how to create a simple JavaScript Tab using TypeScript and configure the Tab header contents.
Source Code
<!DOCTYPE html>
<html lang="en">
<head>
  <meta charset="UTF-8">
  <meta http-equiv="X-UA-Compatible" content="IE=edge">
  <meta name="viewport" content="width=device-width, initial-scale=1.0">
  <title>Document</title>
  <link rel="stylesheet" href="css/style.css">
</head>
<body>
   <div class="container">
    <ul id="nav-tab">
      <li>
        <a href="#home">Home</a>
      </li>
      <li  class="active"><a href="#product">Product</a></li>
      <li><a href="#about">About</a></li>
      <li><a href="#contact">Contact</a></li>
    </ul>
    <div class="tab-content">
      <div class="page" id="home">
        <h2>Home Page</h2>
        <p>Lorem ipsum dolor sit amet consectetur, adipisicing elit. Labore voluptates atque magnam molestiae odit cum autem maxime distinctio omnis nam porro, itaque, eius deserunt fugit aut doloremque facere velit esse. Lorem ipsum dolor sit amet consectetur adipisicing elit. Mollitia dicta dolorem non dolor quas, enim autem quod rem quibusdam incidunt quidem fuga consequuntur magnam quaerat quisquam eum quam, consequatur vel repudiandae architecto expedita! Magnam est porro quis accusamus ab doloremque dolores neque quos, asperiores iste sint amet, totam exercitationem quibusdam!</p>
      </div>
      <div class="page page-active" id="product">
        <h2>Product Page</h2>
        <p>Lorem ipsum dolor sit amet consectetur, adipisicing elit. Labore voluptates atque magnam molestiae odit cum autem maxime distinctio omnis nam porro, itaque, eius deserunt fugit aut doloremque facere velit esse.</p>
      </div>
      <div class="page" id="about">
        <h2>About Page</h2>
        <p>Lorem ipsum dolor sit amet consectetur, adipisicing elit. Labore voluptates atque magnam molestiae odit cum autem maxime distinctio omnis nam porro, itaque, eius deserunt fugit aut doloremque facere velit esse. Lorem ipsum dolor sit amet consectetur adipisicing elit. Sed, autem.</p>
      </div>
      <div class="page" id="contact">
        <h2>Contact Page</h2>
        <label>Name</label>
        <input type="text">
        <p>Lorem ipsum dolor sit amet consectetur adipisicing elit. Veritatis, inventore!</p>
      </div>
    </div>
   </div>
  <script src="js/script.js"></script>
</body>
</html>
css/style.css
@import url('https://fonts.googleapis.com/css2?family=Titillium+Web:wght@300;400;600;700&display=swap');


*{
  font-family: 'Titillium Web', sans-serif;
  margin: 0;
  padding: 0;
  box-sizing: border-box;
}
body{
  background-color: #2c3e50;
  width: 100vw;
  height: 100vh;
  display: flex;
  justify-content: center;
  align-items: center;
}
.container{
  max-width: 800px;
  background-color: #ecf0f1;
  border-radius: 3px;
  box-shadow: rgba(17, 17, 26, 0.1) 0px 1px 0px;
}

#nav-tab{
  list-style: none;
}
#nav-tab li{
  display: inline-flex;
}
#nav-tab li a{
 text-decoration: none;
 color:rgba(0,0,0,0.5);
 padding: 10px;
 font-weight: 600;
 transition: background 0.5s;
}

#nav-tab li a:hover,
#nav-tab .active a{
  color:#fff;
  background-color: #e74c3c;
}

.page{
  display: none;
  min-width: 800px;
  min-height: 500px;
  border:5px solid rgb(248, 244, 244);
  border-top-color:#e74c3c;
  padding: 10px;
}

.page.page-active{
  display: block;
}

.page h2{
  font-weight: 600;
  margin-bottom: 10px;
  color:#2c3e50;
}
The code you've provided is an example of how to implement tabbed navigation in JavaScript using the event listener method. The first line of code assigns the variable navtab to the element with an ID of "nav-tab". The next line adds an event listener to the navtab element, which listens for clicks and triggers the tabclick function when one occurs.
The tabclick function is responsible for switching between the tabs and their corresponding content. The first thing it does is to select all of the elements with the class of "active" using the querySelectorAll() method and assign them to the variable activeTabs. It then uses a forEach() loop to iterate over the activeTabs and remove the "active" class from each one.
The next step is to select all of the elements with the class of "page" using the querySelectorAll() method and assign them to the variable pages. It then uses a forEach() loop to iterate over the pages and remove the "page-active" class from each one.
The next step is to add the "active" class to the tab that was clicked. The event.target property returns the element that triggered the event, in this case the tab that was clicked. The parentElement property returns the parent element of the tab, which is assumed to be the element containing the tab. The classList.add() method is used to add the "active" class to this element.
The last step is to add the "page-active" class to the corresponding content. The event.target.href property returns the value of the href attribute of the tab that was clicked. The code uses the split() method to extract the part of the href that comes after the "#" symbol and assigns it to the variable "id", which is the same as the id of the content page. The code then uses the getElementById() method to select the content page and add the "page-active" class to it.
js/script.js
const navtab=document.getElementById("nav-tab");

navtab.addEventListener('click',tabclick);

function tabclick(event){
  //Get all The active Tabs
  const activeTabs=document.querySelectorAll('.active');

  activeTabs.forEach((tab)=>{
    tab.classList.remove('active');
  });

  const pages=document.querySelectorAll('.page');

  pages.forEach((page)=>{
    page.classList.remove('page-active');
  });

 //event.target.parentElement.classList.add('active');
 event.target.parentElement.className+='active';


 let id=event.target.href.split("#")[1];
 const page=document.getElementById(id);
 page.classList.add('page-active');
}
Output
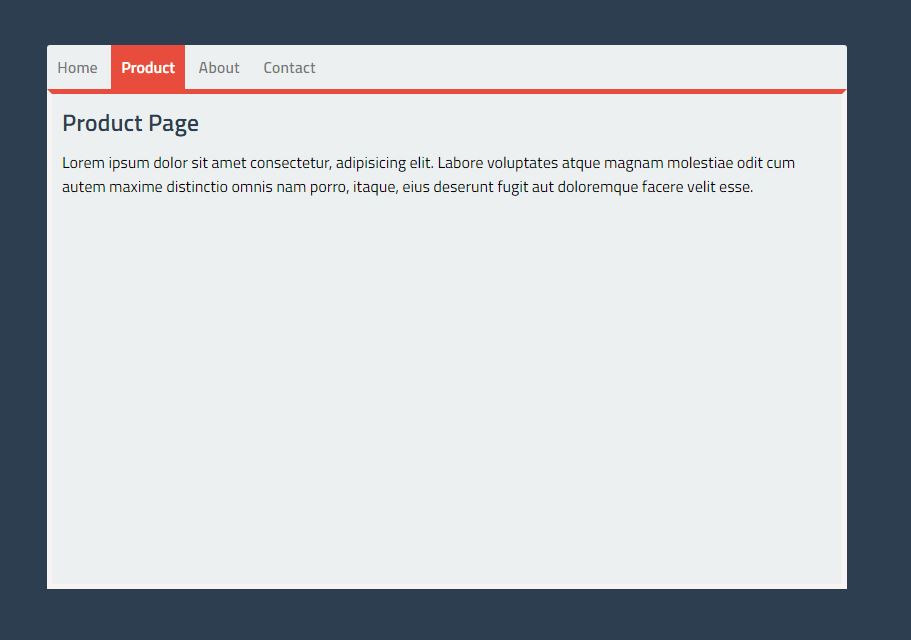
Live Preview
List of Programs
JavaScript Arrays & Methods Examples
JS Practical Project
Learn All in Tamil © Designed & Developed By Tutor Joes | Privacy Policy | Terms & Conditions