Interactive Image Gallery with Previous and Next Navigation in JavaScript
An "Interactive Image Gallery with Previous and Next Navigation in JavaScript" is a web component that allows users to view a collection of images in a visually engaging and user-friendly manner. The gallery provides buttons or controls to navigate between images, usually labeled as "Previous" and "Next," enabling users to cycle through the images one by one
Here's a step-by-step explanation of how it works:
- HTML Structure: The image gallery is usually built using HTML, CSS, and JavaScript. The HTML structure will include a container to hold the images and navigation controls. Each image is represented by an <img> tag or a background image within a container element
- CSS Styling: CSS is used to style the image gallery, including the appearance of images, navigation buttons, and overall layout. It ensures that the gallery is visually appealing and responsive across different devices and screen sizes.
-
JavaScript Functionality: The core functionality of the interactive image gallery is implemented using JavaScript. Here's how it typically works:
- Image Array: Create an array that holds the URLs or file paths of the images you want to display in the gallery.
- Load Default Image: When the page loads, the first image from the array is displayed as the default image in the gallery.
- Next and Previous Navigation: When the "Next" button is clicked, the JavaScript code loads the next image from the array and displays it in the gallery. Similarly, when the "Previous" button is clicked, the previous image in the array is displayed.
- Looping: To create a seamless user experience, the gallery can be designed to loop back to the first image when the "Next" button is clicked on the last image and vice versa.
- Event Listeners: Event listeners are attached to the "Next" and "Previous" buttons to detect clicks and trigger the appropriate actions to change the displayed image.
-
Additional Features: Depending on the complexity of the gallery, you can add extra features, such as:
- Thumbnail Navigation: Show a row of thumbnails below or beside the main gallery to allow users to click on a thumbnail to display the corresponding image.
- Captions: Include captions or descriptions for each image, which can be displayed along with the images.
- Fullscreen Mode: Enable users to view the images in fullscreen mode for a more immersive experience.
Here is an example code snippet that demonstrates this approach:
Source Code
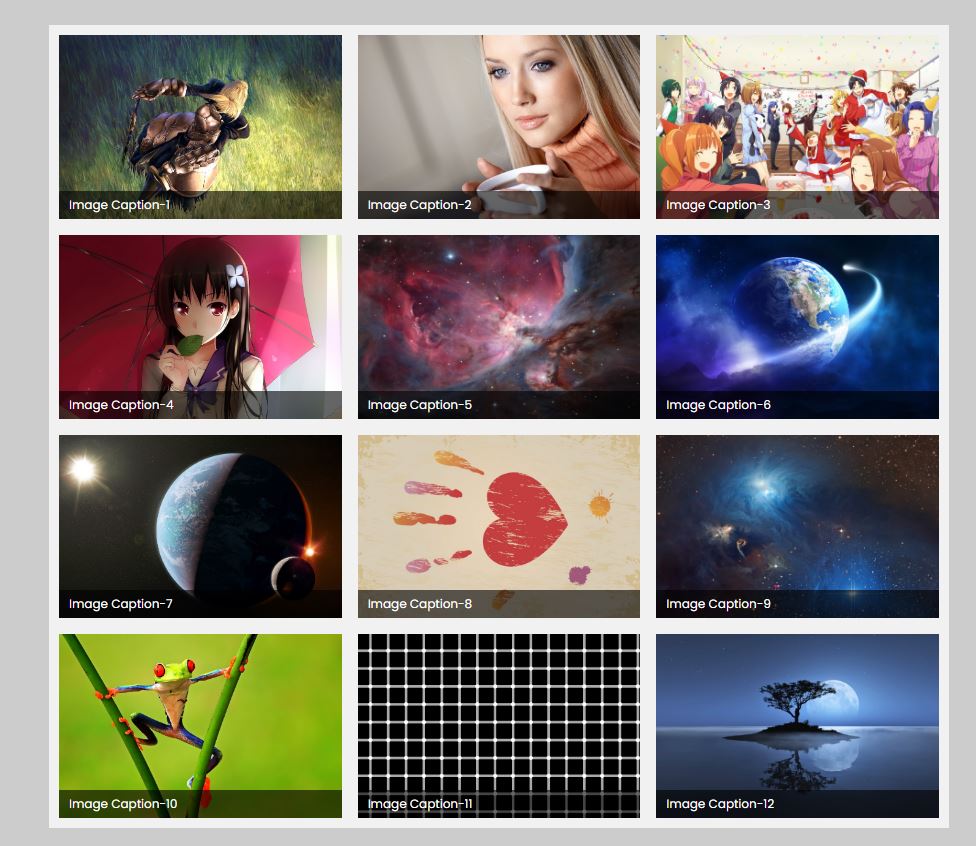
<!DOCTYPE html> <html lang="en"> <head> <meta charset="UTF-8" /> <meta name="viewport" content="width=device-width, initial-scale=1.0" /> <title>Document</title> <link rel="stylesheet" href="css/style.css" /> </head> <body> <div class="container"> <div class="images"> <div> <span>Image Caption-1</span> <img src="images/1.jpg" alt="Image Caption-1" /> </div> <div> <span>Image Caption-2</span> <img src="images/2.jpg" alt="Image Caption-2" /> </div> <div> <span>Image Caption-3</span> <img src="images/3.jpg" alt="Image Caption-3" /> </div> <div> <span>Image Caption-4</span> <img src="images/4.jpg" alt="Image Caption-4" /> </div> <div> <span>Image Caption-5</span> <img src="images/5.jpg" alt="Image Caption-5" /> </div> <div> <span>Image Caption-6</span> <img src="images/6.jpg" alt="Image Caption-6" /> </div> <div> <span>Image Caption-7</span> <img src="images/7.jpg" alt="Image Caption-7" /> </div> <div> <span>Image Caption-8</span> <img src="images/8.jpg" alt="Image Caption-8" /> </div> <div> <span>Image Caption-9</span> <img src="images/9.jpg" alt="Image Caption-9" /> </div> <div> <span>Image Caption-10</span> <img src="images/10.jpg" alt="Image Caption-10" /> </div> <div> <span>Image Caption-11</span> <img src="images/11.jpg" alt="Image Caption-11" /> </div> <div> <span>Image Caption-12</span> <img src="images/12.jpg" alt="Image Caption-12" /> </div> </div> </div> <div class="modal"> <span class="close">×</span> <div class="modal-content"> <img src="images/2.jpg" alt="" class="modal-img" /> <div class="modal-txt">Sample Text</div> <div class="modal-nav"> <button type="button" class="btnPrev">❮</button> <button type="button" class="btnNext">❯</button> </div> </div> </div> <script src="js/script.js"></script> </body> </html>
js/script.js
document.addEventListener("DOMContentLoaded", function () {
  const images = document.querySelectorAll(".images img");
  const modal = document.querySelector(".modal");
  const modalImg = document.querySelector(".modal-img");
  const modalTxt = document.querySelector(".modal-txt");
  const closebtn = document.querySelector(".close");
  let currentIndex = 0;

  const prevBtn = document.querySelector(".btnPrev");
  const nextBtn = document.querySelector(".btnNext");

  //Add Click Event for All Images
  images.forEach((image, index) => {
    image.addEventListener("click", function () {
      currentIndex = index;
      updateModalContent();
      modal.classList.add("show");
    });
  });

  //Update Image in Modal
  function updateModalContent() {
    const image = images[currentIndex];
    modalImg.classList.remove("show");
    setTimeout(() => {
      modalImg.src = image.src;
      modalTxt.innerHTML = image.alt;
      modalImg.classList.add("show");
    }, 300);
  }

  //Next button onclick
  nextBtn.addEventListener("click", function () {
    currentIndex = currentIndex + 1 >= images.length ? 0 : currentIndex + 1;
    updateModalContent();
  });

  //Previous button onclick
  prevBtn.addEventListener("click", function () {
    currentIndex = currentIndex - 1 < 0 ? images.length - 1 : currentIndex - 1;
    updateModalContent();
  });

  //Code for Close Icon
  closebtn.addEventListener("click", function () {
    modal.classList.remove("show");
  });
});
This code is a JavaScript implementation of an interactive image gallery with previous and next navigation, along with a modal popup for displaying images in a larger view. Let's go through the code step-by-step:
- DOMContentLoaded Event: The code starts by adding an event listener to the DOMContentLoaded event, which fires when the initial HTML document has been completely loaded and parsed. This ensures that the JavaScript code will only run when the HTML elements are ready to be manipulated.
- Variables and Event Listeners : The code sets up several variables and adds event listeners to different elements to handle interactions:
- currentIndex: This variable will keep track of the index of the currently displayed image.
- prevBtn and nextBtn: These variables represent the "Previous" and "Next" navigation buttons, respectively.
- Image Click Event: The code adds a click event listener to each image in the images collection using a forEach loop. When an image is clicked, the event handler function is called, which performs the following steps:
- currentIndex: is set to the index of the clicked image.
- updateModalContent : function is called to update the modal with the clicked image's content.
- modal : The modal is shown by adding the "show" class to the modal element, which changes its visibility to visible.
- Update Modal Content Function: The updateModalContent function is responsible for updating the modal's content with the current image information:
- It removes the "show" class from modalImg to hide the image temporarily.
- After a short delay (300ms), it sets the src attribute of modalImg to the source of the current image and sets the innerHTML of modalTxt to the alt text of the current image.
- It adds the "show" class back to modalImg to display the image along with its caption.
- Previous and Next Navigation: The code adds click event listeners to the "Previous" and "Next" buttons (prevBtn and nextBtn). When these buttons are clicked, the corresponding event handler functions are called:
- For the "Next" button, it increments currentIndex by 1. If currentIndex exceeds the number of images, it loops back to the first image.
- For the "Previous" button, it decrements currentIndex by 1. If currentIndex becomes negative, it loops to the last image.
- The updateModalContent function is called after updating currentIndex to display the new image in the modal.
- Close Icon Event: The code adds a click event listener to the close button (closebtn). When clicked, the modal is hidden by removing the "show" class from the modal element.
Overall, this JavaScript code creates an interactive image gallery with previous and next navigation, and it displays the selected image in a modal popup when clicked.
css/style.css
@import url("https://fonts.googleapis.com/css2?family=Poppins:wght@300;400;500;600&display=swap");

* {
  margin: 0;
  padding: 0;
  box-sizing: border-box;
  font-family: "Poppins", sans-serif;
}
body {
  width: 100vw;
  height: 100vh;
  display: grid;
  place-items: center;
  background-color: #ccc;
}
.container {
  padding: 10px;
  width: 900px;
  min-height: 800px;
  background-color: #f1f1f1;
  cursor: pointer;
}
.images {
  display: grid;
  grid-template-columns: repeat(3, 1fr);
  grid-gap: 1em;
}

.images img {
  width: 100%;
  height: 100%;
  object-fit: cover;
}
.images div {
  position: relative;
}
.images div span {
  position: absolute;
  left: 0;
  bottom: 0;
  width: 100%;
  background-color: rgba(0, 0, 0, 0.6);
  color: #fff;
  padding: 5px 10px;
  font-size: 12px;
}

.modal {
  position: fixed;
  height: 100%;
  width: 100%;
  top: 0;
  left: 0;
  background-color: rgba(0, 0, 0, 0.7);
  backdrop-filter: blur(2px);
  display: none;
  place-items: center;
  color: #fff;
}
.close {
  position: absolute;
  top: 1em;
  right: 1.5em;
  font-size: 25px;
  cursor: pointer;
}
.modal-content {
  min-height: 800px;
  width: 800px;
  display: flex;
  flex-direction: column;
  justify-content: center;
}

.modal-content img {
  width: 100%;
  object-fit: cover;
  opacity: 0;
  transition: opacity 0.5s ease-in-out;
}
.modal-content img.show {
  opacity: 1;
}
.modal-txt {
  font-size: 20px;
  padding: 10px 5px;
}

.modal-nav {
  padding: 10px 5px;
}

.modal-nav button {
  padding: 5px;
  width: 100px;
  font-size: 20px;
  background-color: transparent;
  color: #fff;
  border: 1px solid #ccc;
  border-radius: 2px;
  cursor: pointer;
  transition: 0.5s;
}

.modal-nav button:hover {
  background-color: teal;
}

.show {
  display: grid;
}
Output
Live Preview
By combining HTML, CSS, and JavaScript, an interactive image gallery with previous and next navigation provides a visually appealing and engaging way for users to explore a collection of images on a website.
List of Programs
JavaScript Arrays & Methods Examples
JS Practical Project
Learn All in Tamil © Designed & Developed By Tutor Joes | Privacy Policy | Terms & Conditions