Using the HTML5 Data List Tag for Improved User Experience
The HTML5 datalist tag is used to provide a list of predefined options for an input element, such as a text box. The purpose of the datalist tag is to provide the user with a dropdown list of options that they can select from, while still allowing them to enter a custom value if needed. The datalist is associated with an input element via the "list" attribute, which references the id of the datalist. The options within the datalist are defined using option elements.
When the user focuses on the associated input element, they will see a dropdown list of options. They can either select one of the options or type in a custom value. This provides a better user experience compared to a standard text input, as it helps guide the user towards valid inputs and reduces the chance of them entering invalid data.
The datalist tag is a useful tool for improving the user experience on forms and can be used in a variety of contexts, such as providing a list of country names, currency codes, or product names.
Source Code
<!DOCTYPE html>
<html>
  <head>
    <title>HTML | Tutor Joes</title>
  </head>
  <body>
    <form>
        <input placeholder="Enter Login Name" list="myList">
        <datalist id="myList">
            <option> Ram</option>
            <option> Sam</option>
            <option> Kumar</option>
            <option> Sakthi</option>
            <option> Ravi</option>
        </datalist>
    </form>
  </body>
</html>
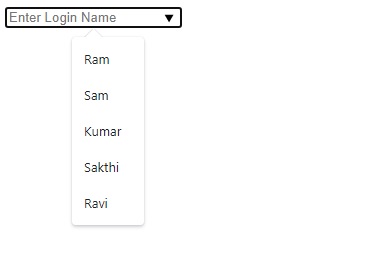
Output :
This code defines a simple HTML form that contains an input element and a datalist.
- The form starts with a standard HTML form tag, which is used to create a form for user input.
- Inside the form, there's an input element that has a "list" attribute. This attribute is used to associate the input element with the datalist that provides the dropdown options. The "list" attribute's value is the id of the datalist, in this case, "myList".
- The datalist element is defined next, using the datalist tag and an id attribute with the value "myList". This matches the value of the "list" attribute on the input element, linking the two elements.
- Inside the datalist element, there are multiple option tags, each of which defines a single option that will appear in the dropdown list. In this case, there are five options: "Ram", "Sam", "Kumar", "Sakthi", and "Ravi".
When the form is rendered, the user will see a text box with a placeholder text of "Enter Login Name". When the user focuses on the text box, a dropdown list with the options from the datalist will appear, allowing the user to select one of the predefined options or enter a custom value.
HTML5 Tutorial
Learn All in Tamil © Designed & Developed By Tutor Joes | Privacy Policy | Terms & Conditions