Debug in Flask Application
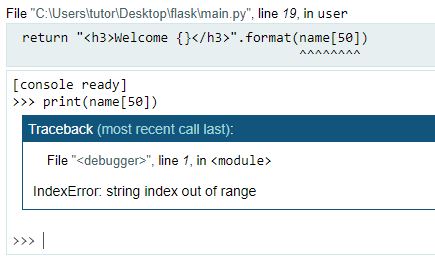
The Flask web framework provides a built-in debugger that can be used for debugging Flask applications during development. When the Flask debugger is enabled, it generates a random PIN (a secret key) to prevent unauthorized access to the debugger.
Here's how you can use the Flask debugger PIN in your Flask application:
Enable Flask debugger : You can enable the Flask debugger by setting the debug attribute of your Flask application to True as shown in the following example:
from flask import Flask

	if __name__ == Flask(__name__)
		   app.debug = True
Note : Be cautious when using the Flask debugger in production environments, as it may expose sensitive information and pose security risks. It is recommended to only enable the Flask debugger during development.

Access the debugger PIN : When you run your Flask application with the debugger enabled, Flask will generate a PIN and display it in the console output. The PIN will be required to access the debugger in the web browser.

Enter the PIN in the browser : To access the Flask debugger in the web browser, you need to enter the generated PIN. Open your web browser and navigate to the URL of your Flask application. You should see a page displaying the debugger PIN, and you will be prompted to enter the PIN.


Enter the PIN in the provided field and click "Confirn Pin" to access the Flask debugger in your browser. Once authenticated, you can use the debugger to set breakpoints, inspect variables, step through code, and debug your Flask application.


Note : The Flask debugger PIN is randomly generated each time you run your Flask application with the debugger enabled, so it will be different every time you start your application. Make sure to check the console output for the latest PIN when you run your Flask application with the debugger.
Flask Tutorial
Learn All in Tamil © Designed & Developed By Tutor Joes | Privacy Policy | Terms & Conditions