C#.Net Project With MySQL Database Connection
| Category | Programming |
|---|---|
| Programming Language | C# Programming |
| Database | MySQL Database |
| Author | Tutor Joes |
The purpose of this article is to demonstrate how to use and connect C# application with MySQL database using MySQL .NET Connector.
What is MySQL?
MySQL is the popular free and open source relational database management system. MySQL was created by a Swedish company MySQL AB, founded by David Axmark, Allan Larsson and Michael. The first version of MySQL is released on 23 May 1995.Sun Microsystems acquired MySQL AB in 2008.
MySQL Connector/Net
Connector/Net lets you easily develop .NET applications that require secure, high-performance data connectivity with MySQL. It implements the required ADO.NET interfaces and integrates into ADO.NET aware tools. Developers can build applications using their choice of .NET languages. Connector/Net is a fully managed ADO.NET driver written in 100% pure C#. It does not use the MySQL C client library.
Download MySQL Connector
You can use Package Manager to add it as a package and it is the easiest way. You don't need anything else to work with a MySQL database. Or you can run this command in Package Manager Console: Nuget Link
PM> Install-Package MySql.Data
Step-1
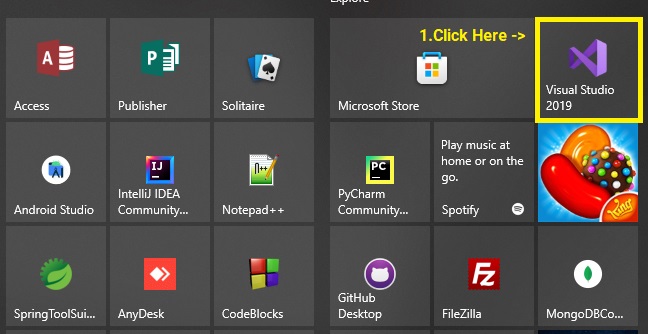
Go to search box type visual studio or click the visual studio icon in start menu and Microsoft Visual Studio will open in our side now we are using 2019 version you can also download latest visual studio community version in Microsoft website for free.
Step-2
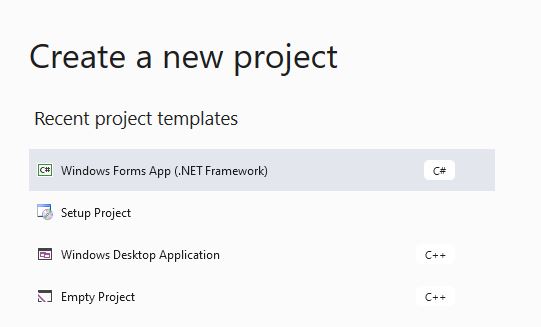
Create a new project by clicking Windows Form App (.Net Framework) in visual studio software.
Then we can name our application as your wish as show below,
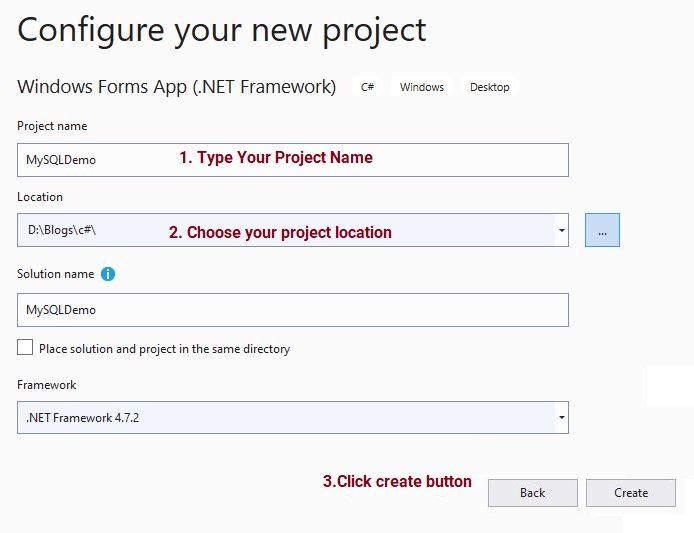
I had named my project as MySQLDemo and you can change the location of your project where you can save in your PC then click the create button to create a project.
Step-3
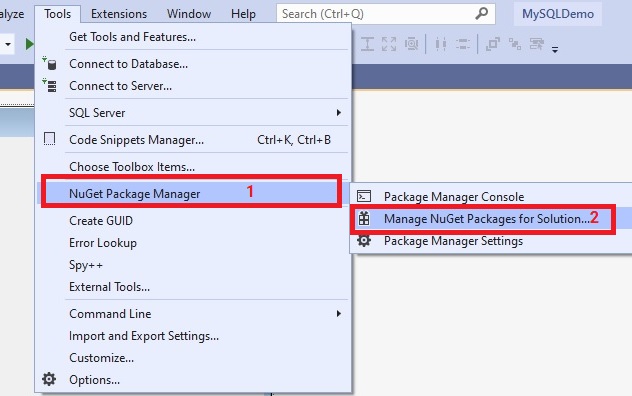
Now go to tools menu in visual studio click NuGet Package Manager and the click on Manage Nuget Packages for Solution…
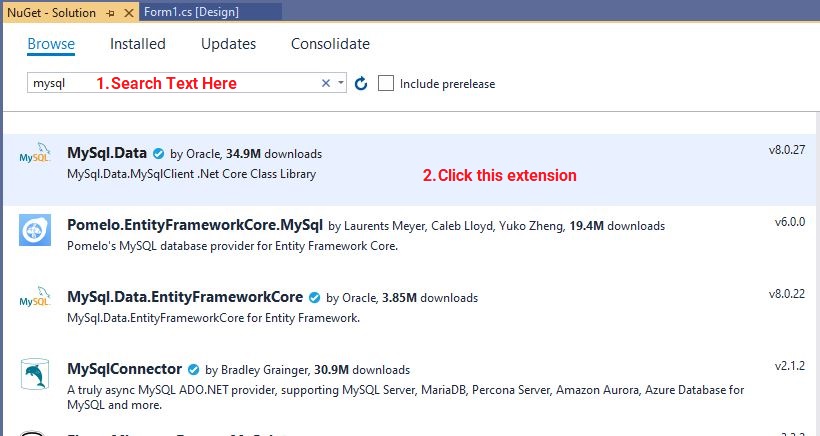
By doing the above step NuGet Solution window open. The go to browse tab and click the search text and type mysql you can see MySql.Data extension in below by Oracle click on it.

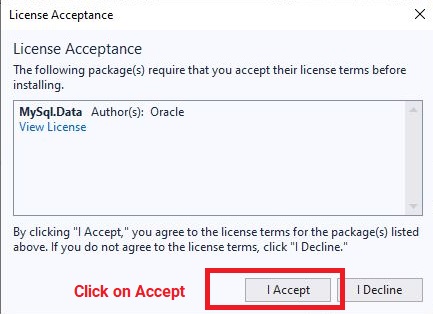
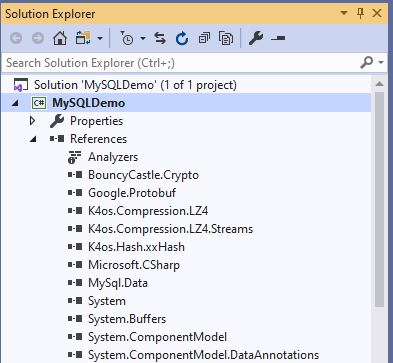
Choose your project and click the install button. Then click I Accept on license agreement. Visual studio automatically download and add MySql.Data library to your project reference now you can easily connect your MySQL server in C#.Net project. Now you can see MySQL library in your project on reference section as shown in the below picture.
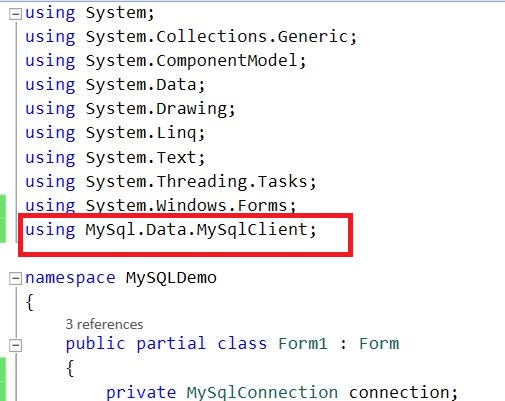
Next, you need to add MySql Library in your C# project as shown in the below picture.
using MySql.Data.MySqlClient;
The following C# Program is used to create a MySqlConnection object, assign the connection string, and open the connection.
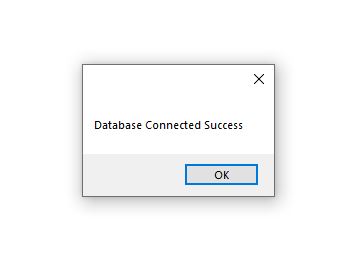
Output
After adding MySQL Library using MySql.Data.MySqlClient; Then declaring and initializing the variables that we will use:
connection: will be used to open a connection to the database.server: indicates where our server is hosted, in our case, it's localhost.database: is the name of the database we will use, in our case it's the database we already created earlier which isjoesDB.username: is our MySQL username.password: is our MySQL password.connectionString: contains the connection string to connect to the database, and will be assigned to the connection variable.
Source Code
using System;
using System.Collections.Generic;
using System.ComponentModel;
using System.Data;
using System.Drawing;
using System.Linq;
using System.Text;
using System.Threading.Tasks;
using System.Windows.Forms;
using MySql.Data.MySqlClient;

namespace MySQLDemo
{
    public partial class Form1 : Form
    {
        private MySqlConnection connection;
        private string server;
        private string database;
        private string username;
        private string password;

        public void ConnectDatabase()
        {
            server = "localhost";  //Server Host
            database = "joesDB";   //Database Name
            username = "root";     //MySQL Server User Name
            password = "root";     //MySQL Server Password
            string connectionString = "SERVER=" + server + ";" + "DATABASE=" + database + ";" + "UID=" + username + ";" + "PASSWORD=" + password + ";";
            connection = new MySqlConnection(connectionString);
            try
            {
                connection.Open();
                MessageBox.Show("Database Connected Success");
            }
            catch (MySqlException ex)
            {
                MessageBox.Show(ex.Message);
            }
            finally
            {
                if(connection.State==ConnectionState.Open)
                {
                    connection.Close();
                }
            }

        }
        public Form1()
        {
            InitializeComponent();
            ConnectDatabase();
        }

    }
}
We had create a new method call ConnectDatabase() where we can create MySQL connection string by concatenating all the above variables. We should always open a connection before querying our table(s), and close it right after we're done, to release the resources and indicate that this connection is no longer needed. Opening and closing a connection to the database is very simple, however, it's always better to use exception handling before opening a connection or closing it, to catch the errors and deal with them.
Conclusion
In this article, I demonstrated how to connect MySQL database connection in C# Application, Hope you can easily understand thank you "Happy Coding".
Categories
Learn All in Tamil © Designed & Developed By Tutor Joes | Privacy Policy | Terms & Conditions